-
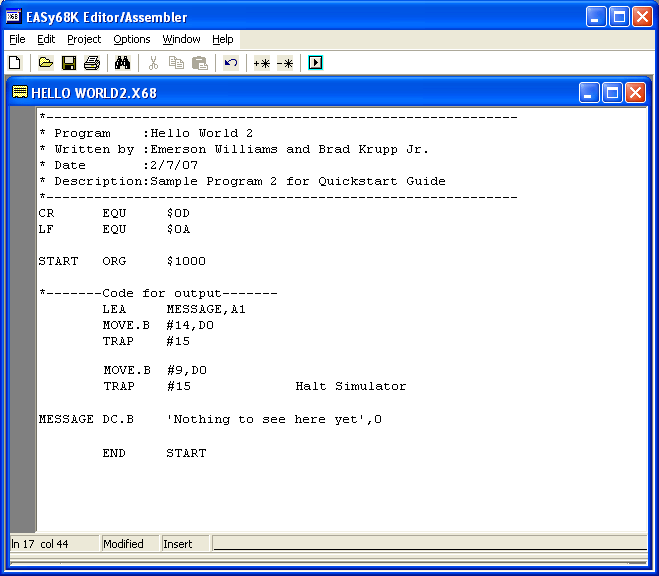
A basic program with a sample output that says 'Nothing to see here yet'
This program is only slightly modified from the first Hello World Program.
-
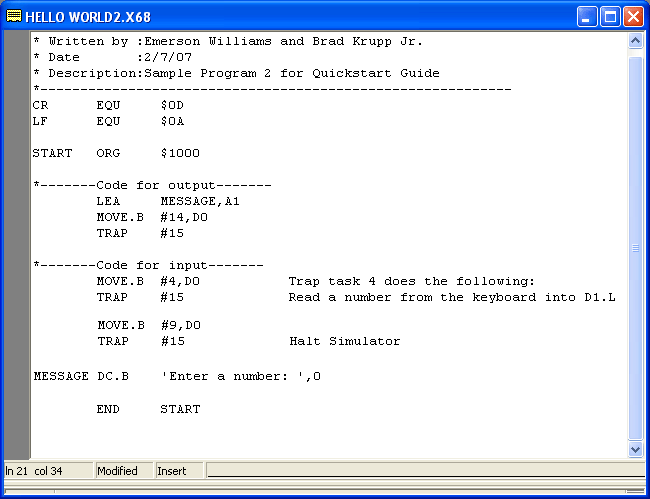
Add in the code for input. Trap task 4 will read a number from the keyboard and store it in D1.
-
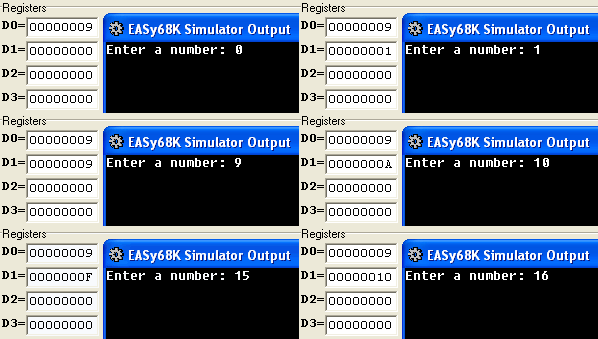
Shown to the left are examples of the contents of the data register given various inputs.
Note that when the input is 10 D1 contains A. this is because the registers show data in Hexadecimal format.
-
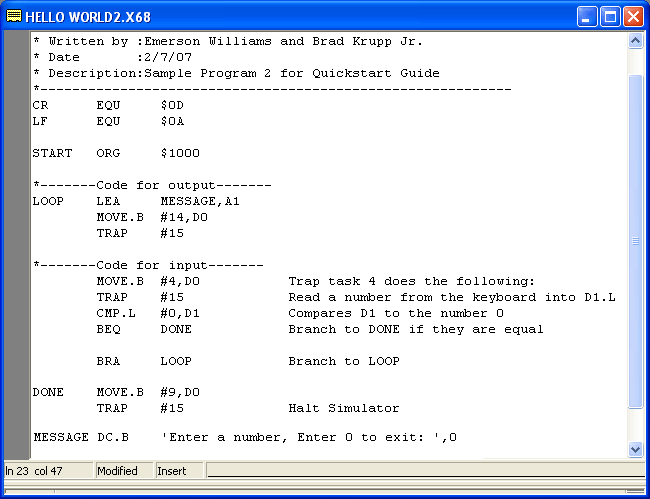
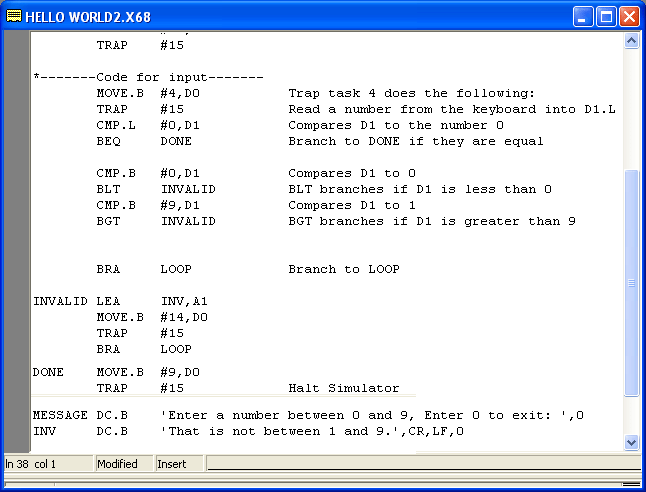
A compare is added to test if the input is a 0 or not.
Notice the branch for the label BEQ. This makes it so that if D1(Your input) is equal to 0 then it goes to the label. This is how you would allow a user to exit the program from input.
-
There is now a BRA branch that is located after the input code. This branches to LOOP, which is located at the output statement. This makes it so that you can do the process over and over again.

-
Sample output for the code above.
-
Add code to check for valid input. First if the input is "less than" (BLT) zero it branches to the invalid output. Second is the input is "greater than" (BGT) 9 it branches to the invalid output. Together these prevent the program from continuing if the input is out of the range of 0 through 9.
-
The code after the Loop label's branching is the code for output of an invalid message. This is done the same way as the other output, except with a different trap task. Also it loops always after this to the LOOP label.

-
Sample output of the code above.
-
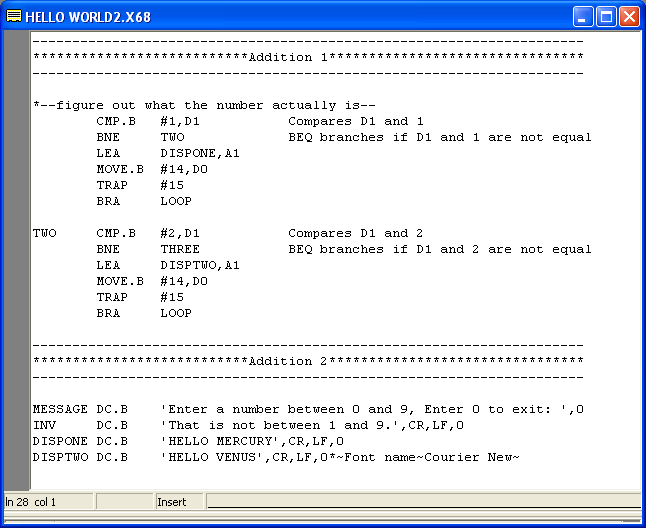
Addition 1 goes below the input code
Addition 2 goes with the message labels
For the complete list of additions click here.
For the final program with all of the additions click here
-
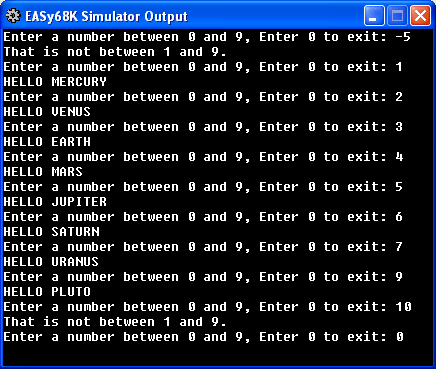
Sample output of the final code.